Wednesday, February 1, 2012

I'm in the MIDDLE of it!

We  have been busy with a FEW projects - like 50 ba-zillion it seems. Well not really it just feels like it!
We are
1. Putting wood floor down in the hallway upstairs.
2. Repainting the house - BUH-BYE dark brown/tan and faux finishes - HELL-OO lighter color.

3. Putting up board and batten in the family room.
4. Putting up a back splash in the kitchen.
5. Converting the stairs from carpet to WOOD floors.
6. Re-doing the kids bathroom - once again get rid of the BROWN! Ugh!

Here are pics of work in progress - AKA sneek peak time


Hallway wood going in
AND THIS


Family Room Board and Batten

And I am going to attempt THIS Soon - 


My inspiration, my blog crush, Mandi from Tidbits from the Tremaynes, her stairs are AMAZING - Check them out HERE!!


MY stairs - Soon to look like Mandy's!
This week we are putting up the new back splash!  Found it on clearance for CHEAP!!


Stay tuned for more. We are more than half way done.


What is THEE BEST PART of getting all this done.
Once its done - I GET TO DECORATE!!
Guess what I'm doing??  You will have to wait and see - here is a hint... using Orange, Green, and Pallets!! And a lot of spray paint will be involved!

Saturday, January 28, 2012

Mummsies Little Gift

My totally wonderful and awesome Mum (insert english accent here)  had a birthday a couple weeks ago.
I made her a little gift.
She is into to DIY and she has always wanted her own tool box.

So I wanted to do a little some-thin some-thin for her birthday.
I looked on line for Pink tool boxes. They were ALL - WAY WAY out of my price range!
But then PINK is not my Moms favorite color.
LIME GREEN IS!!

SOOO - I said to myself. "Self, just paint one!"

Then the wheels started churn'in.
So here is what I did...
I head over to my local Home Depot. And bought a standard, black plastic TOOL BOX.
I taped off the handle and other thingy's that I wanted to leave black or gray.
And I plastic primed away....


Plastic Primer is a MUST! The regular paint wont stick if you don't prime it. (not that I know from experience or anything) 
After the Primer was done drying, I sprayed it LIME GREEN - Mummy's Favorite Color!!
Let is dry for a good 27 hours. (I counted, don't judge)

And here is the final result. (sorry for the cell phone photo, was in a hurry to get to give it to Mummsie and didn't grab my camera)

I added the vinyl, that I just made real quick with my Sillouette!

I think it turned out AMAZING! And the best part was that good ole' Mummsie loved it!! (I think)

Thursday, January 19, 2012

Do You Remember???

This Kitchen????


then this kitchen????

Well, it's now getting a new dress......... out with the RED and in with the off-white and soft gray blue.  YAY.


Wall cabinets are all the same now edging out the red cabinets to the off-white glazed cabinets that are existing. The island is now a soft gray blue color and I do love it. I know you must think I'm crazy since the red cabinets are not that old and I just went through this with the kitchen...ummmmm ...... yup.... three years ago. Yup! I did. Well, the story of the red cabinets goes like this. They were pretty and I like the style but what I hated was that they showed every finger print, every smudge of food (yuck), every little drip of water or milk and dare I say DUST. I was constantly wiping them down and I just got tired of it. Looking back it was a mistake to do the red since it showed everything but I still love my kitchen and really red's a has been color for me so it wasn't so hard to erase it. I love the soft gray blue. I have one more cabinet to do over the fridge and then it's done. It'll be off- white glazed.


Thursday, January 5, 2012

Valentine Art

I was bored this afternoon. 
I saw this dang cute printable on Pinterest.
Here is the LINK to the website it is on
WE ALWAYS SAY THIS!!
Well we say - I LOVE YOU TO INFINITY AND BEYOND! (We are kind of Disney freeks and Toy Story freeks)

Well I jumped on Picnik and played around this afternoon.
Here is my printable that I came up with..


I LOVE IT!!  Now I think I am going to make more!! 

Saturday, December 31, 2011

My Projects of 2011

As I look back at this past year I have completed a lot of projects. I didn't realize that I had till I was going through pictures the other night!
So here is a re-cap of some I have done...
repainted my old pots - refurbished them

Laundry Cabinets (lost verb under the wash - oops) 

Main floor Half Bath Re-do

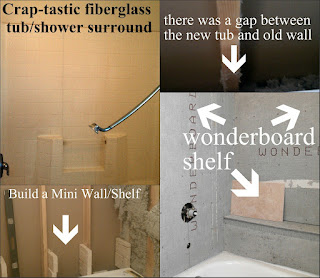
Master Shower
Final Tiled Shower
NO sew curtains
A's Room Finally got done!
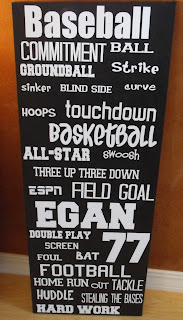
Ryan's Sport Subway Art
My Trees
Made the tinsel trees - Marshmellow World Sign - Branches with bulbs

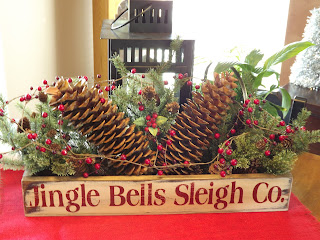
My Mom made the Jingle Bell tray - I did the HUGE pinecones in it!
Hope everyone has a Happy New Year!!  Look for more fun and exciting projects/DIY/recipes to come in 2012!!

Tuesday, November 22, 2011

DIY Outdoor Trees in Planters

We all have looked at the BIG BOX ads and wanted the cool entry way tress in planters. I bought a set of 2 a couple of years ago, for 80 bucks on sale.
I have always wanted more but, I have limited funds.

SO while "pinning" one night in my Pinterest, I came across this picture of a DIY planter tree.

I clicked for the tutorial here.

Then I thought....
Hey Dood - you can do this too!! 

So I gathered my supplies, and my most awesome Dad let me have 2 of his old tomato cages!! Yea me!!


Supplies.. 2 garlands and 1 cheap filler garland from dollar store
Secure your tomato cage with The Hubs zip tie
 
Wrap around garland - wrapping and securing along the way. 

Quick and Easy !! Use your dollar store garland to fill in the holes. 


Then I added the lights..
To secure the tree in my planter from the LOVELY WIND we have out here in my small town. I kind of sort of used some old yard stakes, bent them up and - WA- LA!!

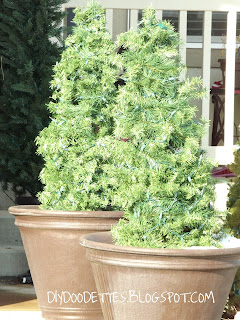
And here is the final product!  LOVE THEM!! They look like the expensive trees that you can buy at the Big Box Stores... but this time my out of pocket was 8 bucks each!!

Friday, November 11, 2011


Check out our Is It Dinner Yet tab to see this post.  Buttermilk Cinnamon Rolls


UPDATE: The verdict is in and I would NOT make these rolls again. Buttermilk is usually a good source for keeping breads and baked good moister longer.........NOT this time. Sadly, these rolls turned out to be harder and 'less fresh' than any I've tried. Not happening again with this one so I won't even share the recipe with you.